


Island Batik Oliso Mini Iron Cover
- Pitchers Boutique

- Aug 4, 2025
- 6 min read
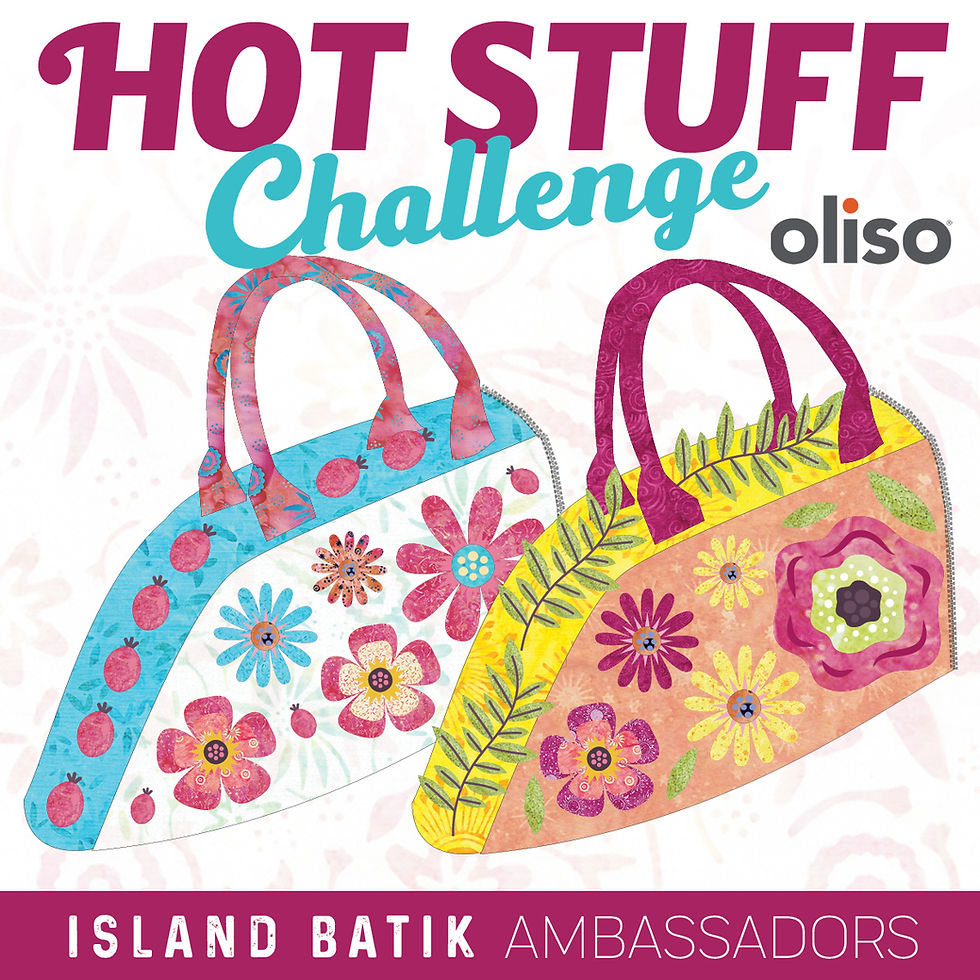
This month's Island Batik ambassador challenge was to decorate and add to the new Oliso mini iron travel case. You can purchase one with matching colors for you mini iron on the Oliso Website. I got the cutest lime green mini iron and the orange travel bag, but even if the colors don't match it still looks adorable because all the colors are bright and bold.
Oliso is amazing, and provided us Ambassadors with their new Mini Irons the M3Pro. These mini irons come with the LED ProLight, ceramic flow soleplate, dual steam and has a 30 and 10 minute auto standby mode. I love that this mini is lighter than the last minis and the LED light is great for illuminating the smaller items that you are pressing. I also feel like the cord is longer but that could just be me.
When I began thinking about what my idea should be to cover my carrying case, I had a few crazy ideas. I was thinking something to highlight the bright colors, maybe an animal, or words. However, I went back to what I do best; FPP!
I designed two patterns for the sides of the carrying case that were magic/witch themed. I love the idea that irons are like magic; they create heat at such a level that they can flatten and press out wrinkles in almost anything. (Now, if we could just do that with these old hands of mine that would be gold, but that's another adventure for another day).
I started with this crystal ball idea:

However, after starting to sew the FPP at the small size of 3.75 x 4 inches, I realized this might not work.

I got the pieces sewn up and thought, this might be too bulky because where the star was coming together I had almost 12 pieces of fabric. It was not well designed, I know. I sometimes, overly design the details, but that's my style. Hey, we try, and try, and try again.
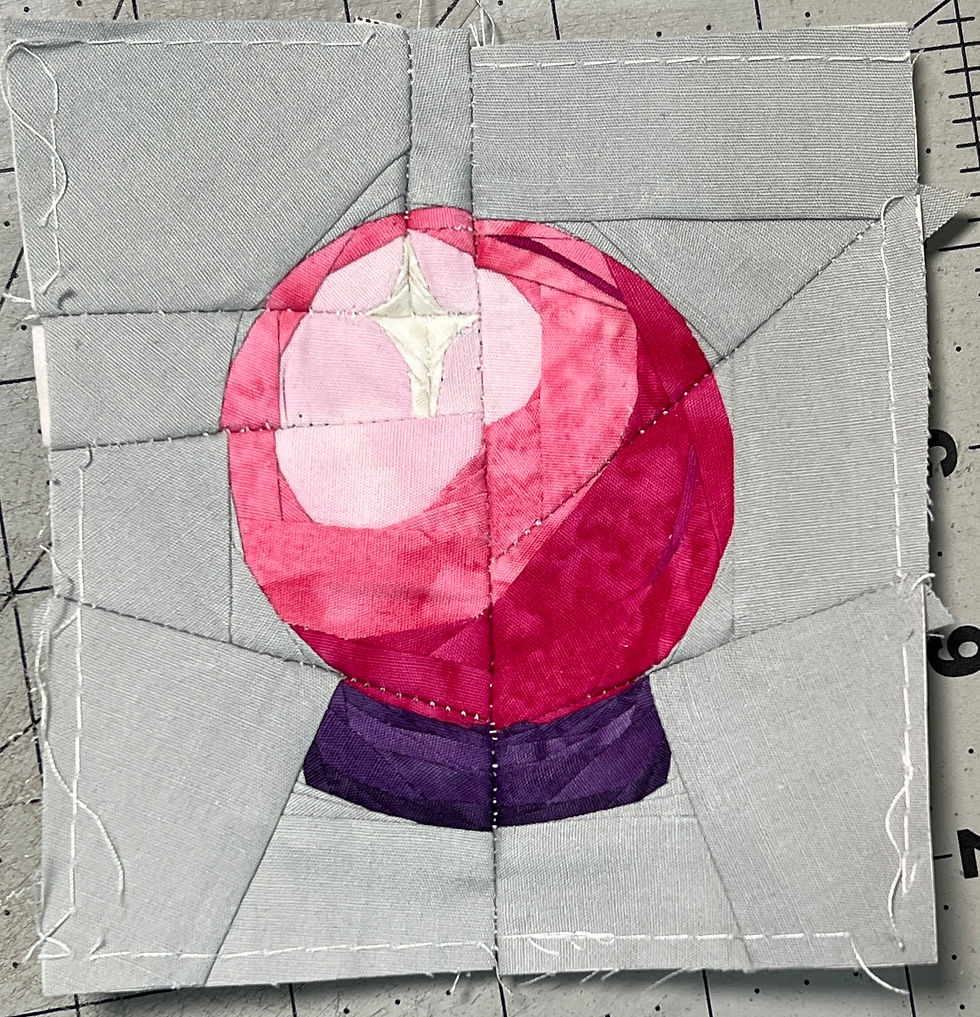
You can see where the star is, the fabric and thread is just pulling. I was so frustrated with how much the entire block was struggling to stay together. This told me I needed to go back to the drawing board.
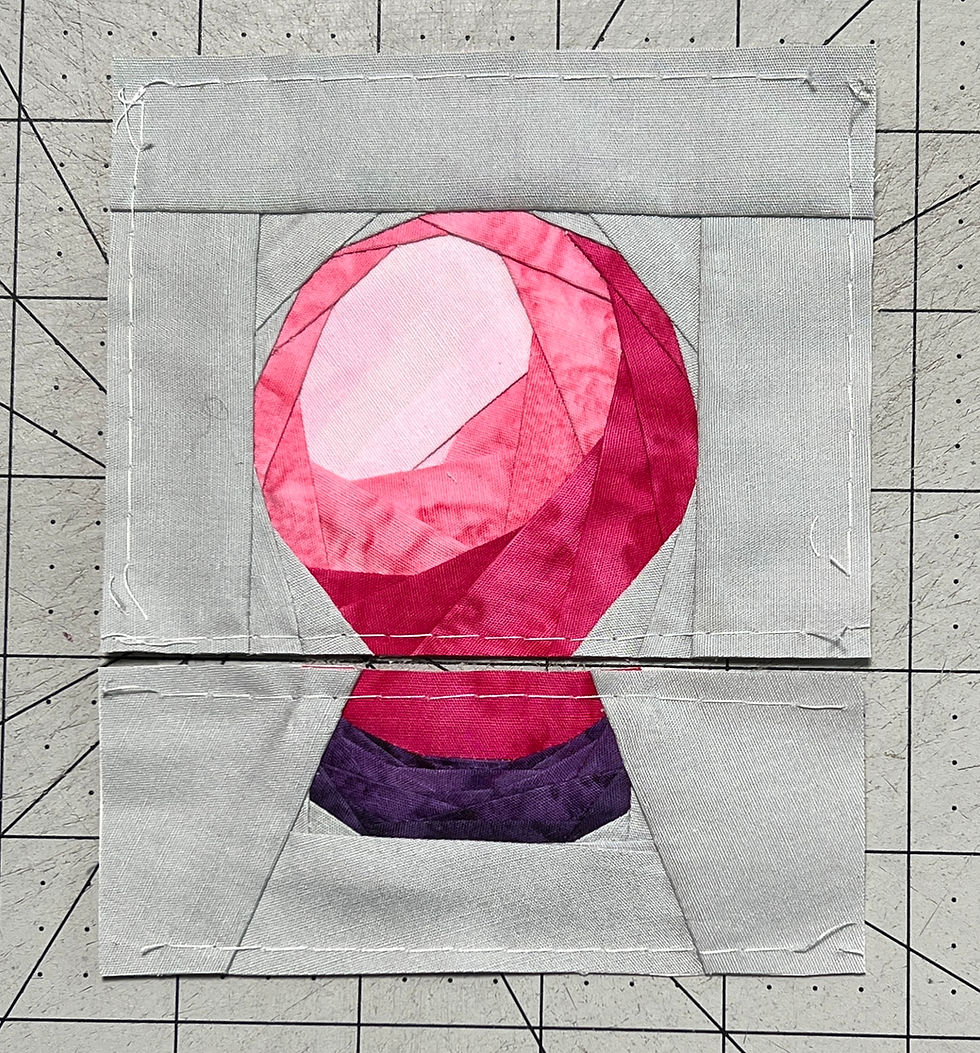
I realized I needed to take away a lot of the extra details, and bulk where the seams were meeting. This is a great reminder to those who are trying to learn to design their own patterns, that you need to be aware of what is being sewn into each seam. That is an important part of designing.

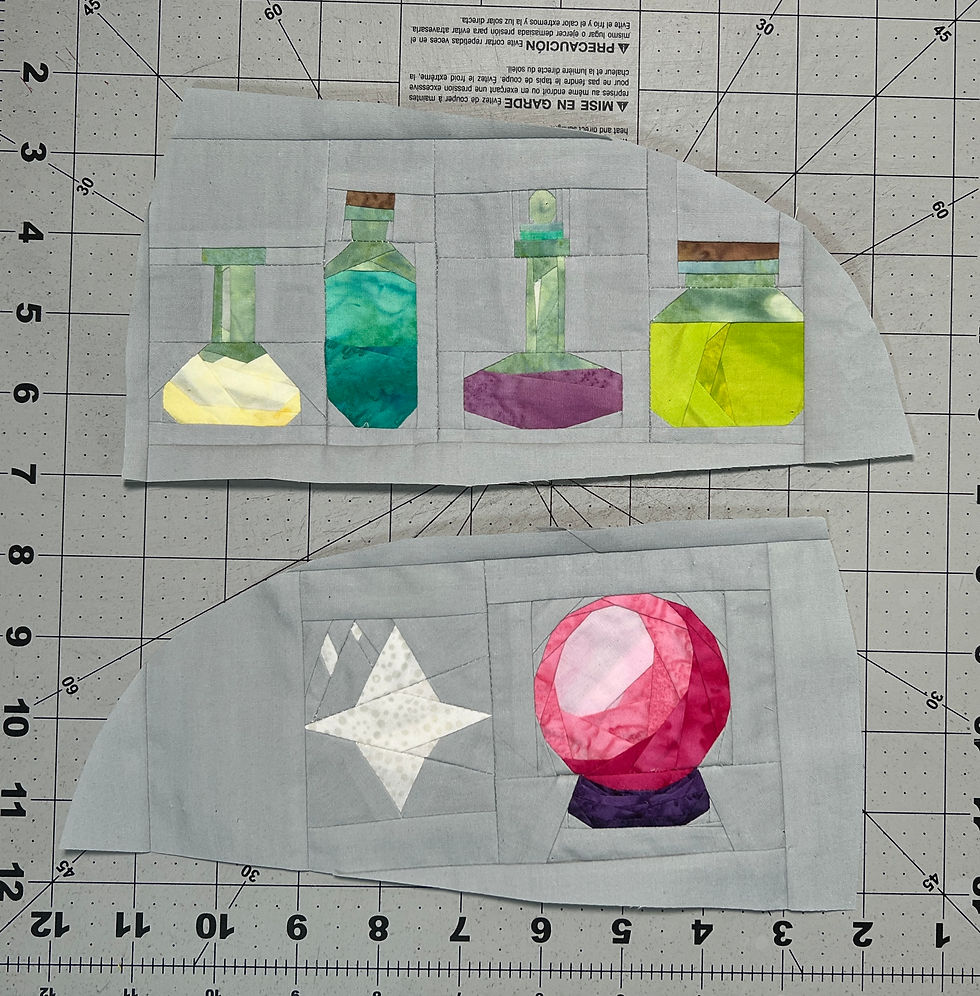
I ended up with this design with only two sections, and it is a more simplified design and I actually really liked it a lot. It still gave the feel of a crystal ball but would be a lot more manageable for the 3.75 x 4 inch block size.

I picked some beautiful bright pink and purple foundation batiks as well as our light solid grey.
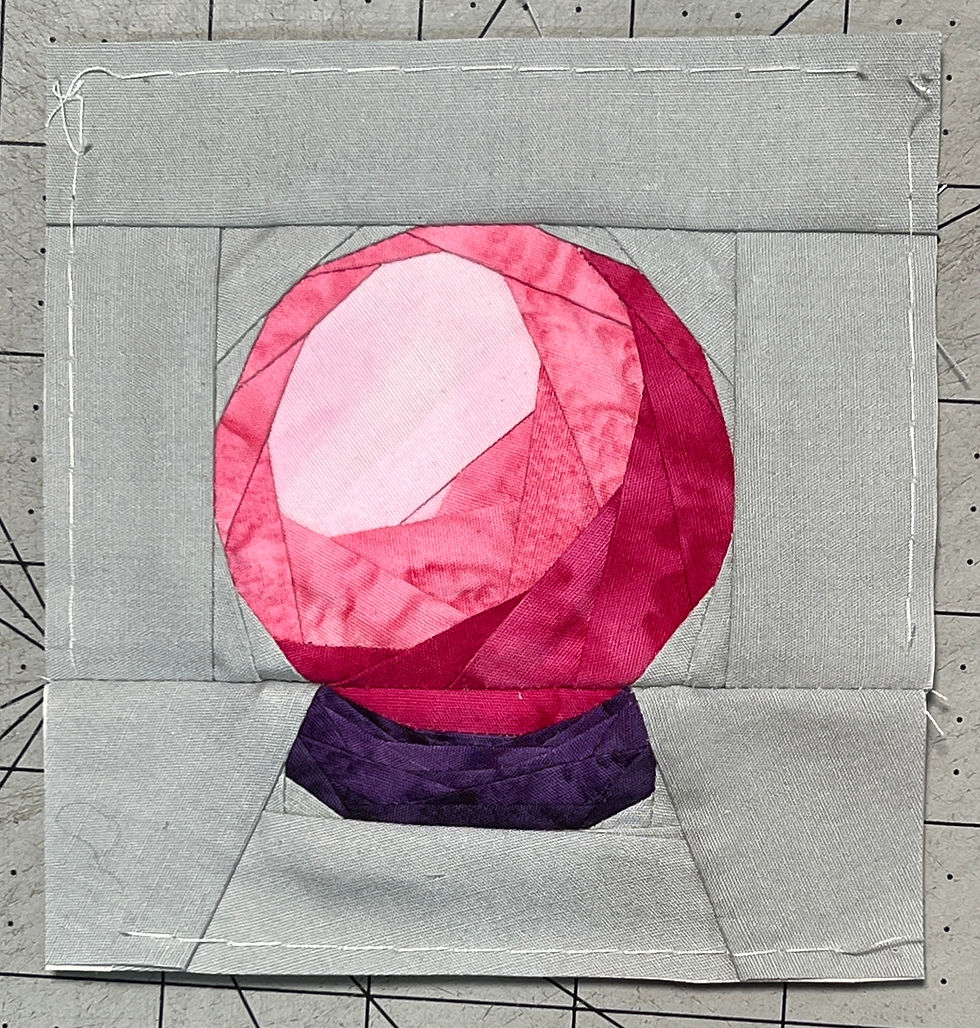
The crystal ball was done and looked amazing, but I still wanted a star, so I made a larger one to sit next to the crystal ball.


The star turned out great.
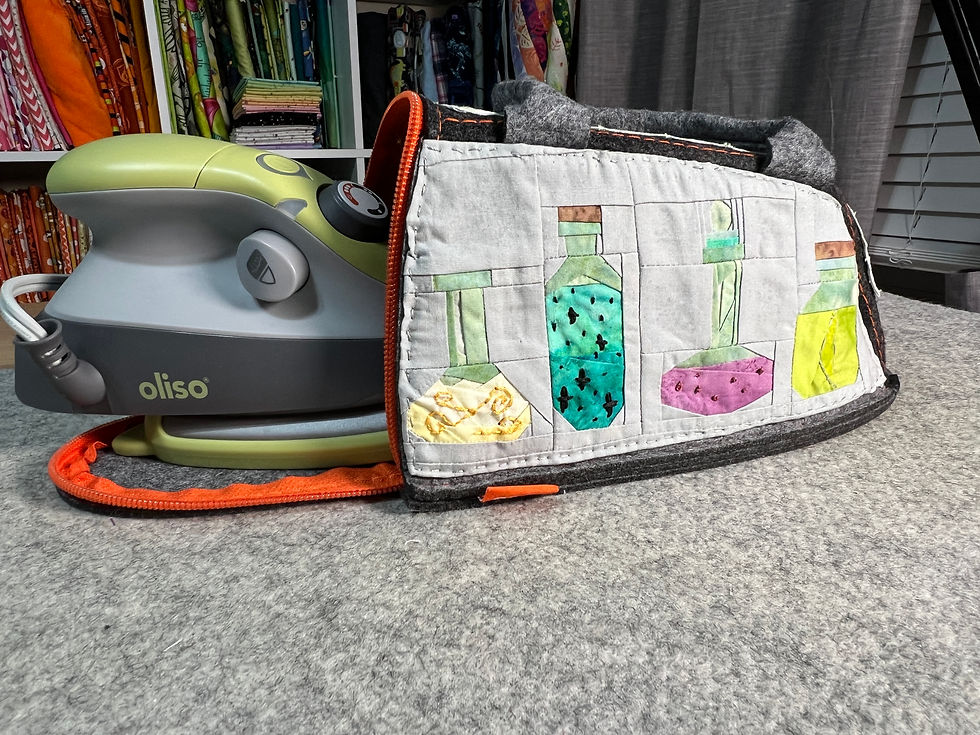
Now I needed to work on something for the other side. I decided I wanted to add some potion bottles because when we use our magic wands (irons) we need our magic potions (starch, water...) So, potion bottles just made sense.

I did originally have a more detailed version but once I sewed the complicated crystal ball, I knew I needed to revise this potion block as well. I made it simple but still kept the overall feel of colors, unique bottles, and whimsy.

I sewed each section, and then sewed each bottle together.
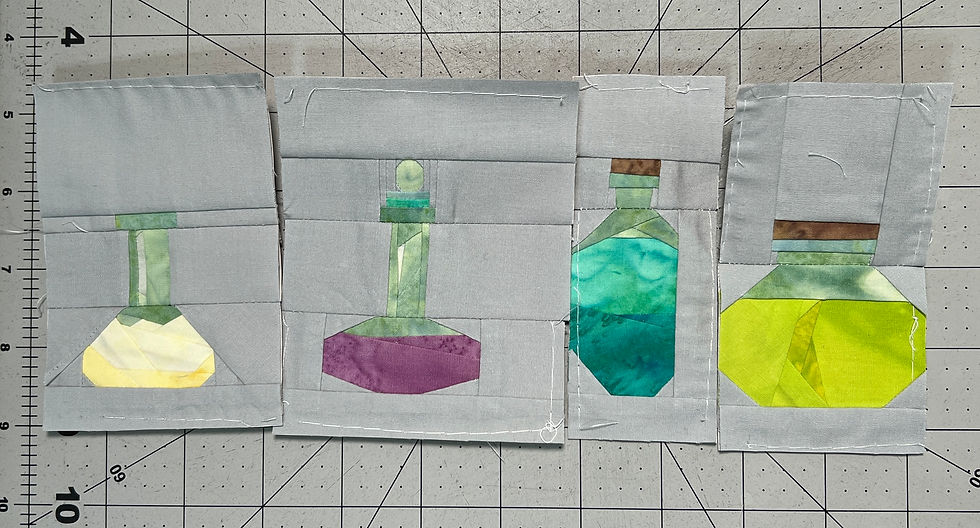
I then started moving them around as you can recall, the cover is curved. I needed to think about the larger bottles being where the largest or tallest, part of the cover would be. I then wanted to move the colors around a bit too, so that it didn't feel heavy on one side.

I eventually landed on a place for each bottle and double checked them with the cover, then added more of the solid grey fabric around the edges of the blocks to make sure it would cover the sides.


I then made a template for the side of the carrying case to make sure that each block was then centered and had enough fabric around it to be sewn on.


I then created a second template that added a seam allowance around the edge so that I could finish the edges of each block before attaching it to the case.

I then was able to lay this template on top of each block to make sure again, that it would be centered and would fit.
I then cut each block out using the template, and gave it another good press.

Using the added seam allowance around the edges, I pressed them back and basted them down.
Now the hard part, how do I get these blocks to stick to this this felt material? Ummmm, I could pin it, but I hate the idea of poking myself a hundred different times, and what if it doesn't lay flat.
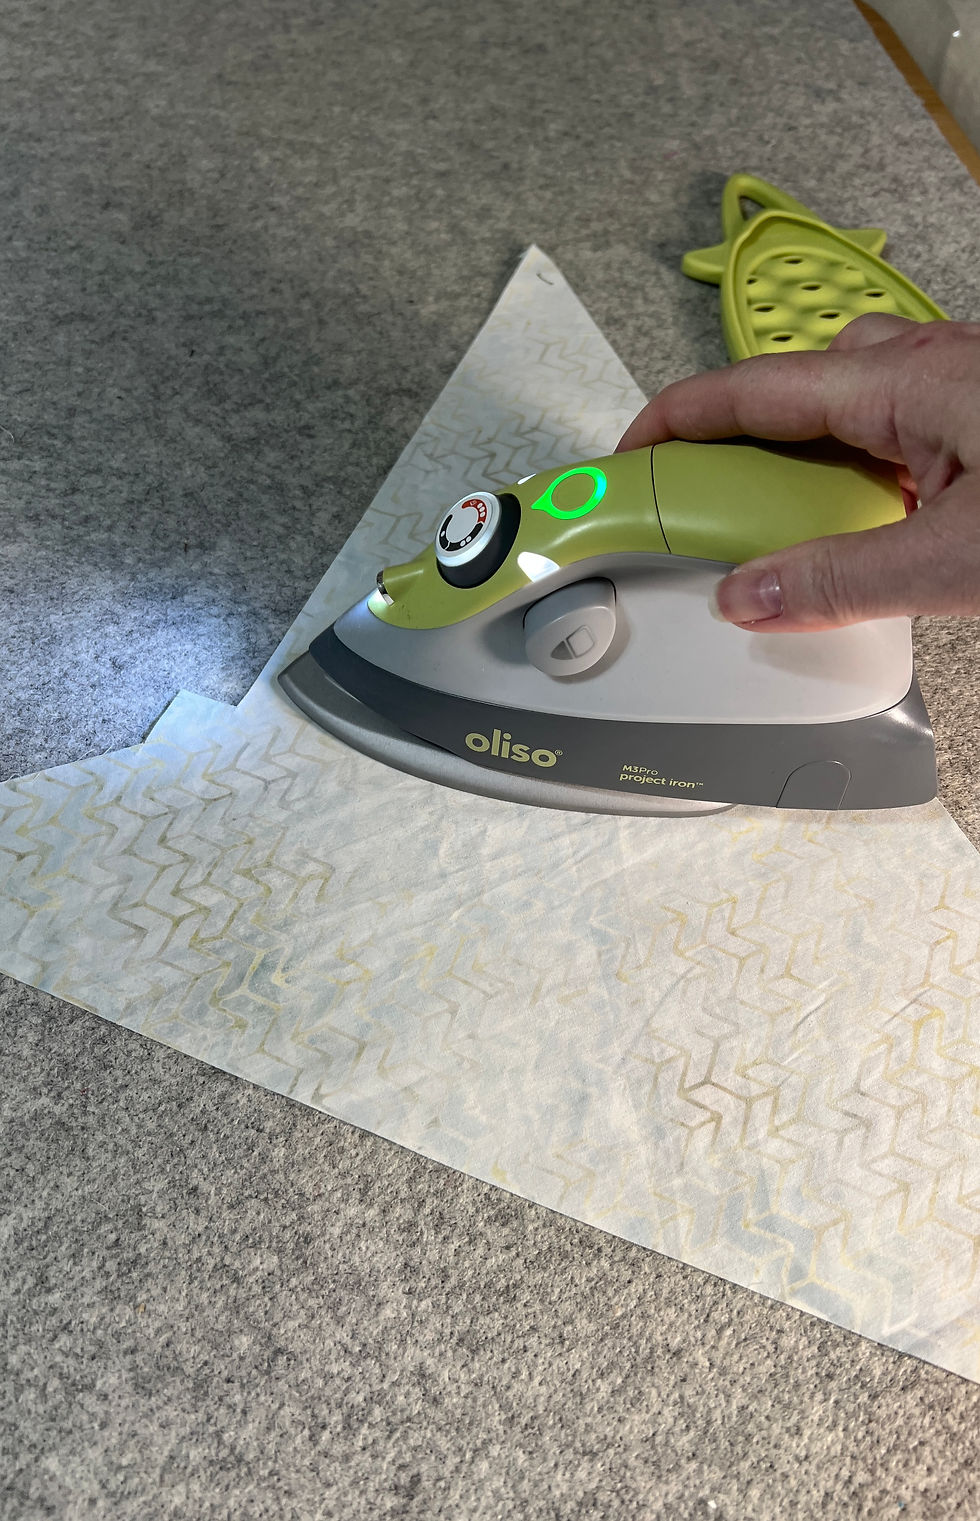
I could use a heat n bond but could I even get the iron in place and hot enough to get it to hold?
Then it hit me, spray basting! That stuff sticks to everything! I did a light spraying of the spray basting to the back of the blocks and pressed them into place. The best part is, that the spray basting isn't permanent so if I needed to shift the block at all, I could just lightly pull up and press back down. It was brilliant!

I then slowly hand sewed each block to the two sides of the case. I used a matching aurifil thread to sew them into place. This wasn't too hard but took time. I did shift and fold the fabric more or less as I went, when needed.

You can see in the image above that the fabric isn't very straight on the far left. While sewing I shifted that fabric to match the case, and pulled the basting threads as I sewed down each side.
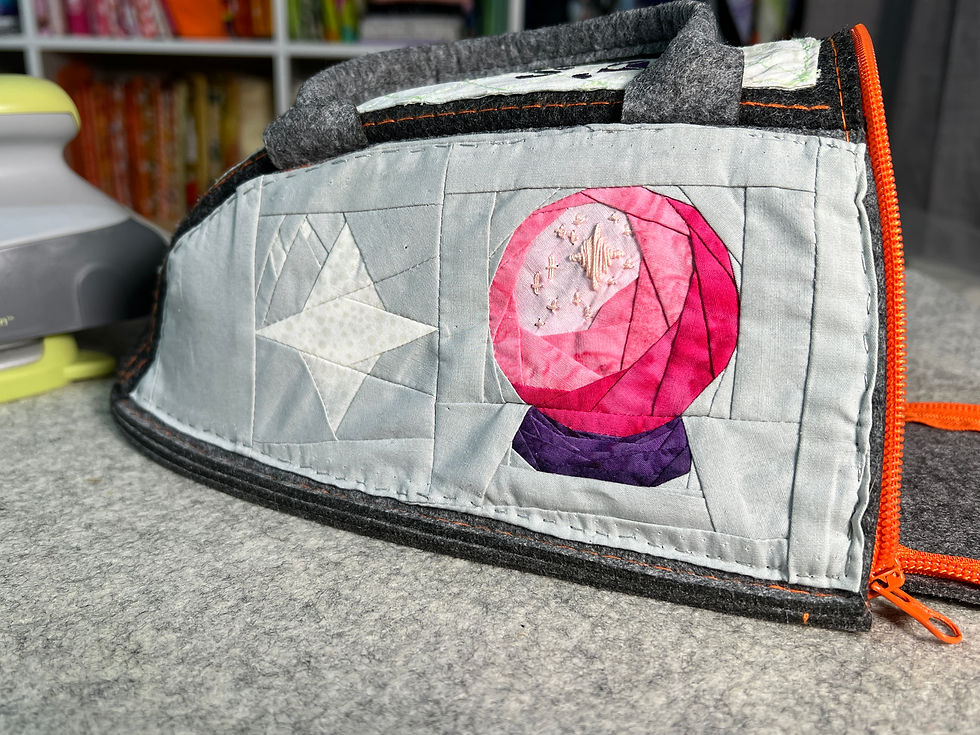
I then added a few small details to the crystal ball with more thread and I felt like this gave the entire block just that much more detail that I wanted in the first place. (I might even add to this over the next few weeks as well).

For the potion bottles I added a little design to each bottle. I really enjoyed practicing my different hand embroidery skills. Especially those french knots.
Lastly, I wanted to add to the center of the case, but this time I wanted to add words. I loved the idea of adding "magic" but that seemed too plain. I ended up with "It's Magic" as that indicates that the iron inside would be the magic! I loved this idea, and using my favorite batik, which is the Fondant. I then added some pops of color for the letters. I used heat n bond to attach the letters to the Fondant fabric, and then quilted the piece to keep them in place.


I even pulled out some glow in the dark thread to give it just that little extra element of magic.


It looked amazing in the dark!
So, lets see the final results:


Thank you again to Oliso for this amazing sponsorship and the adorable new mini iron and carrying case.
Be sure to check out all the other Island Batik Ambassadors covers as well and be sure to let us know what you think.
Brenda Alburl- https://songbirddesigns.blog
Renee Atkinson- https://wordpress.com/posts/pinktulipquilting.studio
Susan Deshensky- www.ladybluequilts.com/blog
Tina Dillard- https://quiltingaffection.blogspot.com/
Brittany Fisher- Www.bobbinwithbrittany.com
Kimberly Flannagan- https://www.kimberlysquilts.com/blog
Preeti Harris- https://sewpreetiquilts.blogspot.com
Mania Hatziioannidi- www.maniaforquilts.com
Kim Jamieson-Hirst- https://www.chatterboxquilts.com/blog
Connie Kauffman- Kauffmandesigns.blogspot.com
Connie Kresin Campbell- https://conniekresin.com/
Emily Leachman- https://thedarlingdogwood.blogspot.com/
Denise Looney- https://quiltery.com
Leah Malasky- www.quilteddelights.com
Susan Michaels-https://dragonflyfiberart.blogspot.com/
Lisa Pickering- https://lisasquiltingpassion.blog/
Gail Sheppard- https://quiltinggail.com/
Carol Stanek- stitchwithcolor.blogspot.com
Solomae Stoycoff- https://cuddlecatquiltworks.com/blogs/island-batik-ambassador-blog
Jennifer Thomas- https://curlicuecreations.com
Suzy Webster- www.websterquilt.com
Thanks for checking out my Oliso Mini Iron Cover.
Happy Ironing!
Situs Toto
Situs Toto
Toto Togel
Bungtoto
situs toto
Toto Togel
situs toto
Bungtoto
Situs Toto
Bungtoto adalah badnar togel online terpercaya yang menyediaakn berbagai pasaran toto resmi dan asil.
Toto Slot
Toto Slot
Toto
Gampangtoto
Gampangtoto
Gampangtoto
Toto Slot
Gampangtoto
Gampangtoto merupakan agen slot gacor yang sudah teruji sejak 2015 sebagai situs resmi bermain slot online yang dilengkapi dengan fitur RTP tertinggi saat ini.
toto slot
toto
toto slot
Winsortoto
Winsortoto
toto
Winsortoto
Winsortoto
Winsortoto telah lama menjadi rumah bagi para penggemar taruhan tebak angka karena situs ini menyediakan prediksi togel paling akurat.
Situs Toto
toto slot
Situs Toto
Winsortoto
Situs Toto
Situs Toto
situs toto
toto slot adalah link daftar resmi menuju situs toto yang menghadirkan pengalman bermain aman, menguntungkan, serta CS 24 jam online.
Tersedia banyak jenis game menarik yang pastinya menguntungkan hanya di
Situs Slot
Rasa4d
toto slot
Rasa4d
toto slot
Toto Slot
Rasa4d
Rasa4d